Showing posts with label spring. Show all posts

4.09.2014

Spring Decor (For the Love of Bunnies)

Have I mentioned how happy I am that it's finally Spring? Like the real Spring, that doesn't include inches and inches of snow?

Because I am. I AM SO HAPPY!

This. This was a month ago.
Like as in the month of March. In Virginia.
Nothing like combining one of the most snowy winters in Virginia's history with a move to a place you don't know many people, and throw two littles into the mix. Fun times.

Momma needed some Spring.

And nothing says Spring like some muddy rain boots. And a bunny.

And with the move, and the new house and all, we got a mantel. Y'all! A mantel! I've never had one of those before, so you better believe that I took the chance to decorate the heck out of that son of a gun. Especially after I read this gem with some sublime suggestions about mantel decorating. It was on. AND there will be a TV at some point (the horror, I know) above said mantel. It screamed at me to decorate it.

So, since all some none of our boxes were unpacked, I did the first thing any sane woman who has no friends and has been cooped up in her new house with two babies (and a whole bunch of unpacked boxes) for the longest winter ever does: I went to Hobby Lobby, then to Home Goods, and added in a little Target. And of course, some stuff I already had :)

Ta da!
And here you have it! It's not perfect, but it will do, and in addition to my Spring wreath, it made me oh, so happy, especially during that last bought of snow. That one almost got me (and my sanity).  And what a great base to start from!! Mr. Kuda has no idea that this is just the beginning of my bunny collection. It may become a problem at some point, but for now, enjoy!


I combined bunnies with bunnies. All different sorts of bunnies, and I love each of them...

That tall gentleman? I couldn't capture it on film, but he's COVERED
in glitter. Tall bunny + glitter = WIN

The sweet angel was a gift from a friend as a welcome to this area. She's made from a Civil War era quilt. So homey and sweet and relevant to where we're living now. Love.


Burlap bunnies? I think we have another winner. Thank you, Target!


We got this clock as a gift when we first got married. It reminds me of our fresh start as a newly married couple. It tracks nap times and bed times, and has been a silent observer of the time we've spent in this little life we've created.


As fun as the bunnies are, I wanted to make sure we aren't overlooking the true reason of this Easter season. God has been so good to us, has been faithful to us, and continues to provide us with grace and mercy day after day after day.


So, happy Spring! Hope you can get outside and enjoy the fresh air this week!


Until next time,

Mrs. Kuda

4.02.2014

Spring Wreath Tutorial

Good morning, y'all! March sure went out like a lion, but the clouds have finally parted, the sun is shining, and IT IS SPRING! Thank heavens!

A side note: This is how I blog lately. Lap child. Thank goodness he's cute...


If you must know, I'm a bit obsessed with making my own wreaths. It's a little ridiculous, but it makes me so happy! AND making them from scratch is So. Much. Cheaper. Really. Like much cheaper than any you'll find in Walmart or Target. Without further ado, I present to you my first....


Note: This wreath was inspired by an article in HGTV Magazine. I'm not sponsored, just love the wreath, and the magazine!

Springy, right?! Let's get started.

Supplies:
* Foam wreath
* 1 1/2" ribbon. I used this. For my 14 inch wreath, I used exactly 6 yards.
* Variety of felt colors, 4-5 squares or about 1/2 yard
* Some push pins or floral U pins
* Hot glue

Time commitment:
* About an hour, maybe two, depending on how many felt flowers you do, and how many children you have running around you while trying to complete it (see photo above).

Start by wrapping the ribbon around your wreath. I used floral U pins to secure.


I folded the ribbon edge over before pushing the pin all the way through so it has a nice finish.


I left a bigger loop for the very end of the ribbon, which I will later use to thread twine through as the means for hanging.

Voila!
Moving on to the felt flowers! I chose white and yellow. As a side note, I am very aware that there are different qualities of felt out there. I am cheap. I will not pay more than 25 cents/12 inch square. Even then I try to get it for 40-50% off at Hobby Lobby (again, not a sponsor, just a place I frequent often). For this project, I had 4 white squares and 4 yellow squares. I did A LOT of practicing and playing with different patterns, and I had several squares left over for future projects. I am not going to go in depth for these flowers, but I will tell you that there's a lot of great info and tutorials on youtube :)

My first flower is similar to a rose. Start off by cutting a largish circle (the above is about 5/6 inches), then cut a spiral until you reach the middle.


Begin by rolling the smaller end of of the circle on its self. Here's where a little hot glue comes in handy to keep it in place, but I would practice a few times before you glue it. When it's small, it can be tricky!


Look how cute they are!


A variation of this is to make your lines wavy as you cut. Go through the same process, starting with rolling from the end into the center.


I glue on the bottom as I go.
Here, you can see the difference between the two. Both are adorable, of course.


Here's another fun flower... Simply cut a two-inch strip, fold it in half long ways, hot glue at just the edge leaving a space in the middle, then snip about 2/3 of the way through all the way down every 1/4 of an inch or so.


Once you've finished, began rolling the strip on itself from one end.


The nice part about this particular flower is you can add another strip, or part of a strip, to make the flower bigger. You really can't tell if there's a seam. Win!


You can either leave the loops as is...


Or snip the loops for a different kind of texture. I used both for this wreath.


One more! I had actually not planned on an additional design, but the wreath needed something more... For the final flower, you need 4-5 (or more) of the same sized felt circles. Mine were about 2 1/2 inches, and made a ~3 inch flower. I used a different color for the center of the flower.


For the center, fold your desired color in half, then roll it up, somewhat loosely. Secure with hot glue.


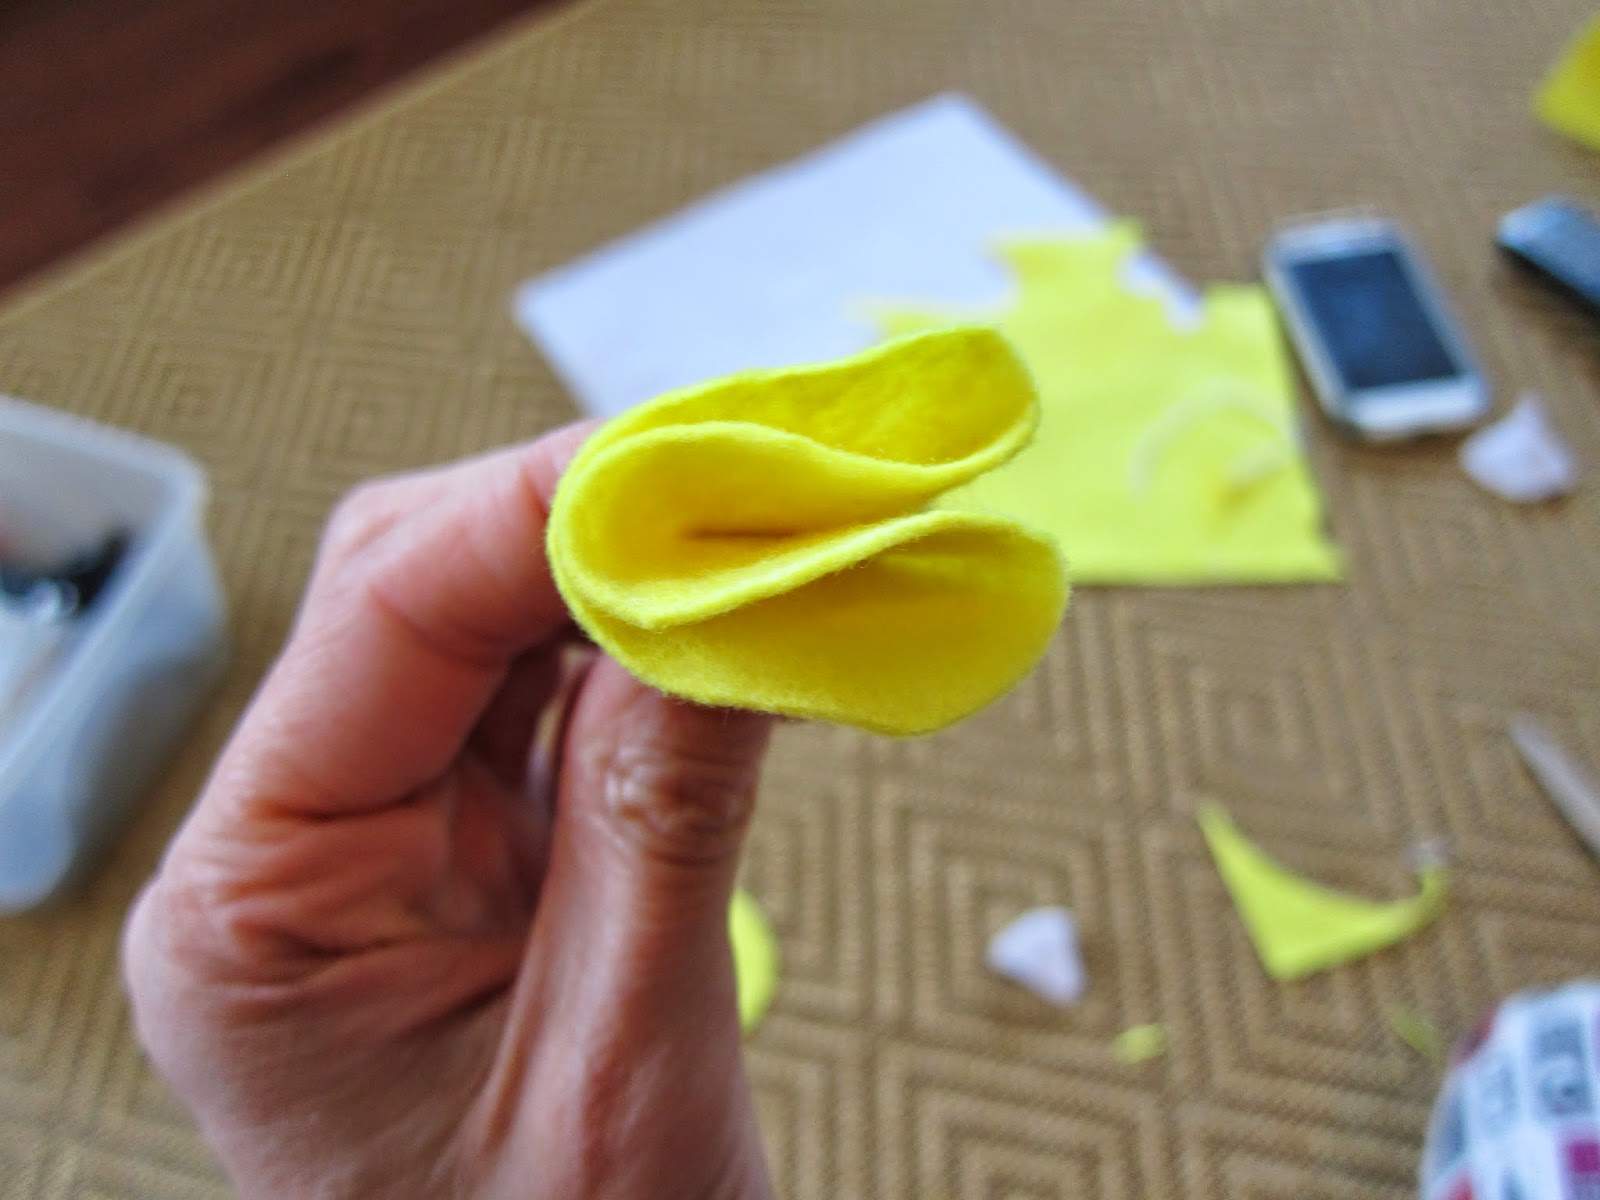
Continue by folding each subsequent circle in half, then in half again.


Glue each twice-folded circle around the center. It takes a little playing with, so practice before you glue!

Ta da!

So pretty :)
After you've completed your felt flowers, it's time for some arranging. I always try to play with different placements before gluing. Usually it becomes pretty clear where things should go after a bit.


I used hot glue to attach my flowers. For the inspiration wreath, they suggested using colored push pins to match the design. What a great idea! I didn't have any on hand, and I wasn't going to make an extra trip out, so hot glue it was.

After I finished gluing the flowers on, I needled some twine through the ribbon loop I had left at the top of the wreath.


Annnnnnnnnnnnd.... Here it is! I may end up adding a bow at some point. Sometimes I live with my wreaths for a little while, then end up adding to it.


What do you think? So springy, right? Seriously, it makes me smile every time I drive up to the house.

Until next time!

Mrs. Kuda

Linking up this week with Serenity Now. Enjoy!

4.29.2013

Tot School: Spring Has Sprung!


Miss E ~ 28 months

This week was one of those weeks that there was just no time to plan, but seeing that we've been so stinking busy in April, I wanted to finish the month off strong. Miss E has had her colors confused for quite some time (except for purple, of course) so I thought for Tot School this week, we could combine our spring theme and colors for a week. And I'm so happy we did! We got outside, got to know our colors a bit more, and I got to see Miss E get creative with the activities I set up for her.

First of all, if you haven't been around the DC Metro area in the past 1-2 weeks, let me just tell you something. It has been GORGEOUS! Like the perfect kind of spring. Really. It's kind of making the winter that never ended seem like a distant memory. Sort of.

What better way than to discover the colors around us than to explore spring? That's exactly what we did. For our first day of Tot School this week, we went for a nature walk. And then we did it Every. Single. Day. Both Mr. C and I loved getting the fresh air, and it was such a joy to see Miss E discovering all of the beautiful colors nature provides.

"Lots' of yellows, mommy!"


"It's kind of like light yellow, mommy."

"You take this home."

For each walk, we focused on one color. Green was the obvious, as it's bursting in everywhere you turn. We also focused on yellow, pink, red, and purple. As a side note, Miss E thought it was hilarious that blueberries tend to have a "dark purpur" (purple) color. How observant!

Here we are shamelessly discovering someone else's tulips. Since mine are already spent. Sigh...


Azalea's are now one of Miss E's favorite spring flowers. There are a TON in our area, and it seems to blow her mind that they come in all sorts of shapes and colors. Too cute.


Since Miss E is an apple that hasn't fallen far from my tree, the kid loves to organize things. Enter our color sorters! I found an awesome pair of little tongs in the $1 bin at Target. I had been searching for something a little easier for her little hands to work on fine motor skills. Clothes pins and regular tweezers were just a bit too challenging (which = frustrating). Finally! That bin never seems to fail me. (And I love how it's parked right near the entrance so I never forget to stop by :)


I just pulled out some of the 4 ounce cups I use for Mr. C's baby food, gave some basic instructions, and Miss E went to town. We went back and forth, suggesting which colors to choose next. So much fun.


And since she had commented on the purple blueberries, I thought it might be the perfect chance to make colors "real world" for her. I grabbed some of her play food, and had her add them to the puffy balls. What a hit! She did this activity over and over and over again. I think I'll add it in next week, too.


I cannot tell you how much this correspondence has changed the way she sees colors. She now brings them up all the time as she observes her surroundings, and it just makes me so stinking happy.


We also have these awesome foam letters that I had originally bought for the bath when Miss E was just a baby. Well, long story short, they never made it there. Miss E did this sorting on her own... I'll let the picture explain itself:


Love her tongue sticking out to the side. Thinking hard!
Here's one of my favorite shots of the week, during our quiet time.

If she wants to read, I'm not going to tell her where to do it.

In addition to the above activities, we colored A LOT, read books with the themes of colors and Spring, and I really let Miss E forge the way. We also did some gardening, but unfortunately missed the photo ops (between keeping Miss from throwing dirt, and Mr. C from eating it). I'm usually a planned activities kind of girl, but that's what I'm loving about Tot School. As long as Miss E is engaged, she's learning!

Until next time,

Mrs. Kuda

Where I'm linking up this week!
Tot School at 1+1+1=1
No Time for Flashcards

 
Blog Template By Designer Blogs